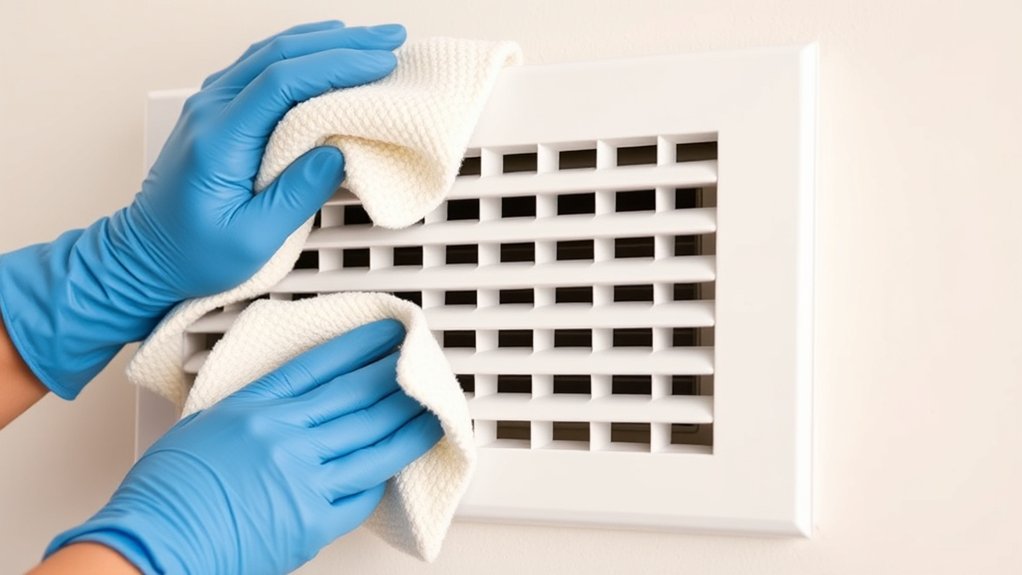
10 Easy Steps to Clean Air Conditioner Vents
To clean your AC vents in 10 easy steps, start by turning on the fan for 5 to 10 minutes to loosen dust. Then, shut off the system completely and remove vent covers carefully. Soak covers in warm, soapy water for 15 to 20 minutes, scrub, rinse, and dry thoroughly.
Next, vacuum vent openings gently with a soft brush attachment. Reinstall covers securely and tighten screws. Don’t forget to change your air filters while you’re at it.
It’s a good idea to schedule biannual cleanings to keep airflow ideal and your indoor air quality fresh. Keep reading for detailed safety tips and maintenance advice.
Why Cleaning AC Vents Matters for Air Quality
Although you mightn’t notice it daily, regularly cleaning your AC vents plays an essential role in maintaining indoor air quality by removing accumulated dust, pollen, and mold spores. These particles can trigger respiratory issues and worsen allergies.
Dust buildup in air vents not only degrades air quality but also poses health risks. The World Health Organization recognizes dust as an occupational hazard, so it’s something to take seriously.
By cleaning your air vents, you reduce indoor allergens considerably. This lowers the risk of asthma and allergy flare-ups, which is great news if you or your family suffer from these conditions.
Additionally, clean vents help your HVAC system run more efficiently by preventing airflow blockages. This reduces energy consumption and can prolong the system’s lifespan.
Studies show that consistent vent cleaning can improve indoor air quality by up to 50%. So, it’s definitely a smart maintenance step for creating a healthier home environment.
Turn On the Fan to Help Loosen Dust First
Before you start cleaning, go ahead and turn on the air conditioner’s fan for about 5 to 10 minutes. This gets the airflow going and helps loosen up dust particles.
By doing this, you’re actually dislodging debris from the vents and ductwork, which makes the cleaning process that much easier.
Plus, the increased air movement helps reduce dust clouds, so the air feels fresher while you’re working.
Fan Operation Benefits
When you turn on your air conditioner’s fan for 5 to 10 minutes before cleaning, it effectively loosens dust and debris trapped within the vents. This fan operation benefits air circulation by pushing dust toward the registers, making removal easier.
Improved airflow also helps your HVAC system run more efficiently and boosts indoor air quality. The World Health Organization points out that dust is an occupational hazard, which is why regular vent cleaning is so important.
| Benefit | Description | Impact |
|---|---|---|
| Dust Loosening | Activates airflow to dislodge particles | Easier dust collection |
| Air Circulation | Improves movement inside ducts | Enhanced cleaning access |
| Dust Direction | Pushes debris toward registers | More effective removal |
| HVAC Efficiency | Maintains system performance | Energy savings & longevity |
| Health & Safety | Reduces airborne contaminants | Better indoor air quality |
Dust Loosening Process
Activating your air conditioner’s fan for 5 to 10 minutes starts the dust loosening process by circulating air through the vents. This airflow dislodges accumulated particles and helps break up settled dust.
This targeted airflow improves ventilation system performance, making the cleaning that follows much more efficient. By loosening dust beforehand, you reduce airborne debris during cleaning and minimize inhalation risks related to dust exposure, something the WHO highlights.
Taking this proactive step ensures dust isn’t firmly stuck to vent surfaces, which means you can remove it more easily. Using the dust loosening process boosts how effective your cleaning routine is, helping maintain great indoor air quality and system functionality in both homes and workplaces.
Enhanced Air Movement
Start by turning on your air conditioner’s fan for 5 to 10 minutes to enhance air movement and loosen dust within the vents. This enhanced air movement circulates air throughout the HVAC system, dislodging dust from hard-to-reach areas and facilitating a more thorough clean.
Performing this step before shutting off your system improves overall air quality by allowing you to collect more dust from registers. Regular maintenance involving this process reduces dust accumulation, which the WHO notes as an occupational hazard in commercial settings.
| Benefit | Description |
|---|---|
| Dust Loosening | Fan circulation loosens embedded dust |
| Deeper Cleaning | Moves dust from inaccessible vent areas |
| Improved Air Quality | Captures more dust, enhancing indoor air |
Incorporate this step into your regular maintenance for ideal vent cleanliness. It’s a simple way to keep your air fresh and your system running smoothly.
Shut Off the AC System Before Starting
Before you start cleaning, be sure to shut off the AC system completely. This helps keep dust from circulating and protects the unit’s components. It’s a simple step that makes a big difference.
Try to schedule your cleaning during low-occupancy times, like early morning. Doing this reduces exposure to airborne particles and keeps everyone safer.
Ensure System Power Off
Although it might seem like a simple step, shutting off your air conditioning system before cleaning its vents is essential to prevent dust and allergens from spreading throughout your space.
To confirm system power off, locate the main power switch or circuit breaker dedicated to the AC unit and turn it off completely. This action stops air circulation, which otherwise disperses dust during cleaning, reducing effectiveness.
Moreover, it creates a safer environment by minimizing your exposure to airborne particles. Whether you’re servicing a residential or commercial system, this precaution aligns with occupational health standards that recognize dust as a hazard.
Always double-check the power status before proceeding to guarantee no accidental activation occurs. This way, you secure a controlled and thorough cleaning process without compromising your safety or indoor air quality.
Schedule Cleaning Timing
Properly scheduling the cleaning of your air conditioner vents means choosing a time when the system is completely shut off. This step is critical to prevent dust clouds from spreading into your living space and to avoid debris circulating through the ducts.
For the best results, try to schedule cleaning during off-peak hours, like early mornings when fewer people are around. It makes the process safer and more convenient. Turning off the AC before you start lets you clean the vents thoroughly without worrying about airborne particles or damaging the system.
Plus, this precaution helps keep your indoor air quality high and reduces the risk of accidents during cleaning. Making sure the system is off also helps maintain its efficiency by stopping dust from re-entering the ducts.
This way, your cleaning efforts work better and your air conditioner stays more reliable.
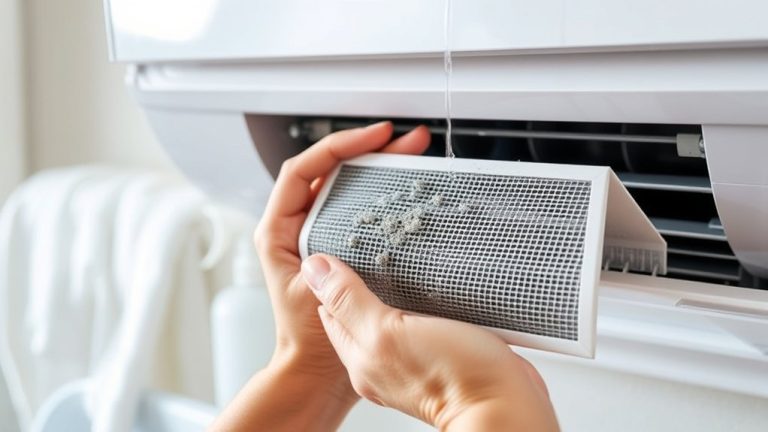
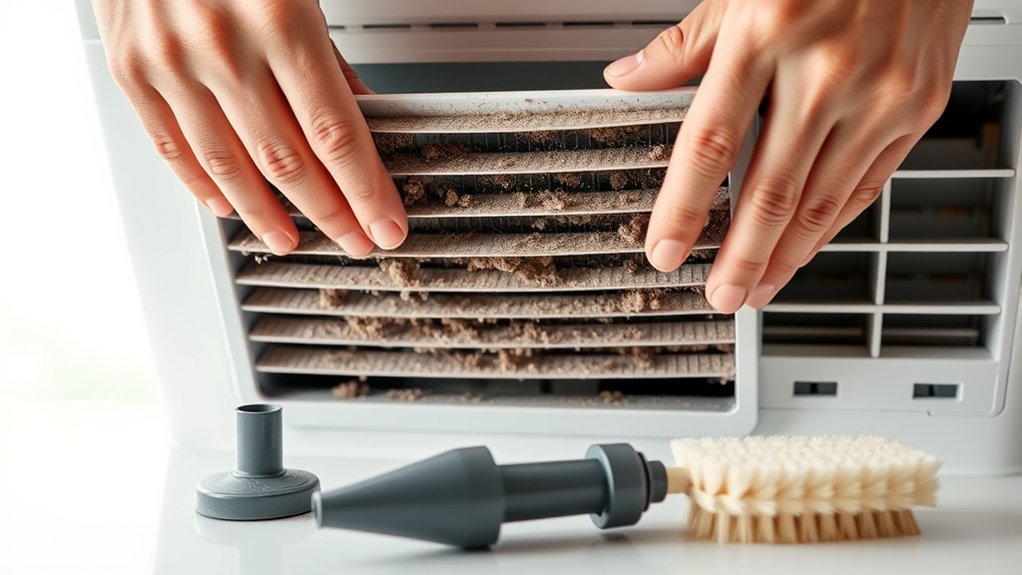
Remove Vent Covers Carefully to Avoid Dust Mess
Since dust can easily scatter when you remove vent covers, start by running the unit’s fan for 5 to 10 minutes to loosen debris inside the ducts.
Before removal, wear a mask to prevent inhaling dust particles. Use a screwdriver to carefully loosen screws on wall or ceiling vents, setting them aside for reassembly.
When you remove vent covers, especially from ceilings, be prepared for dust to fall. Placing plastic sheeting beneath the area helps catch debris and makes cleanup easier.
It’s a good idea to do this task during low HVAC usage seasons to minimize dust exposure and keep your system running efficiently.
Soak and Scrub Vent Covers in Warm Soapy Water
Soak your vent covers in a bucket filled with warm, soapy water for 15 to 20 minutes to loosen dirt and grime effectively. Use a gentle scrubbing brush or sponge to clean both sides thoroughly, removing all dust to prevent airflow obstruction and help prevent mold.
After scrubbing, rinse the vent covers with clean water to remove soap residue. Soap left behind can attract dirt, so make sure to rinse well.
| Step | Tool/Material | Purpose |
|---|---|---|
| Soak | Warm, soapy water | Loosen dirt and grime |
| Scrub | Soft brush/sponge | Remove dust and buildup |
| Rinse | Clean water | Eliminate soap residue |
| Inspect | Visual check | Verify all dirt is removed |
| Prepare for drying | Lint-free cloth | Prevent mold during drying stage |
Dry Vent Covers Completely to Prevent Mold
After rinsing your vent covers thoroughly, you need to guarantee they’re completely dry before reinstalling them. Moisture left on vent covers creates an ideal environment for mold and mildew growth, compromising indoor air quality.
Use absorbent, lint-free cloths to dry thoroughly, ensuring no residual dampness remains. Alternatively, air dry the covers in a well-ventilated area to help moisture evaporate faster.
Consistently check for any moisture buildup around vents and address it promptly to keep a mold-free environment. It’s a simple step but really makes a difference.
Also, keep HVAC filters clean and replace them regularly. When dust accumulates, it increases humidity and encourages mold development near vent covers.
Vacuum Vent Openings Gently to Remove Loose Dust
You should use a vacuum with a soft brush attachment to gently clean vent openings without damaging the ductwork.
Try to use shallow vacuuming strokes so you can remove loose dust without pushing debris deeper into the system.
Also, it’s a good idea to always turn off the air conditioner before you start.
This helps minimize dust dispersion and keeps things safe while you’re cleaning.
Proper Vacuuming Techniques
Begin by gently vacuuming the air conditioner vent openings using a soft brush attachment. This helps dislodge and remove loose dust without damaging the ductwork. For better access to hidden debris, remove the vent cover.
Try to avoid deep vacuuming because it might pull dust further into the system, which reduces how effective the cleaning is. It’s best to schedule this task during times when your HVAC system isn’t running much. This way, you minimize dust disturbance.
| Step | Tool Used | Purpose |
|---|---|---|
| Remove vent cover | Screwdriver | Access hidden dust |
| Vacuum gently | Soft brush tool | Dislodge loose dust without harm |
| Schedule cleaning | Off-peak hours | Reduce dust circulation |
Regular vacuuming of A/C vents helps prevent buildup. This improves both air quality and HVAC efficiency.
Avoiding Duct Damage
While vacuuming air conditioner vents is essential for maintaining airflow and efficiency, it’s crucial to do so gently to avoid damaging the ductwork.
To prevent duct damage, use a vacuum with a soft brush attachment and clean only the vent openings. Avoid pushing the nozzle deeply into the ducts, as this can disturb internal components and cause damage.
Operate the vacuum at a low power setting to minimize the risk of dislodging debris that might harm the duct system. Regularly vacuuming vents reduces dust buildup, which helps sustain airflow efficiency and lessens strain on your HVAC.
If you come across substantial dust buildup inside the ducts, it’s best to schedule professional cleaning services. They can thoroughly clean without risking duct damage.
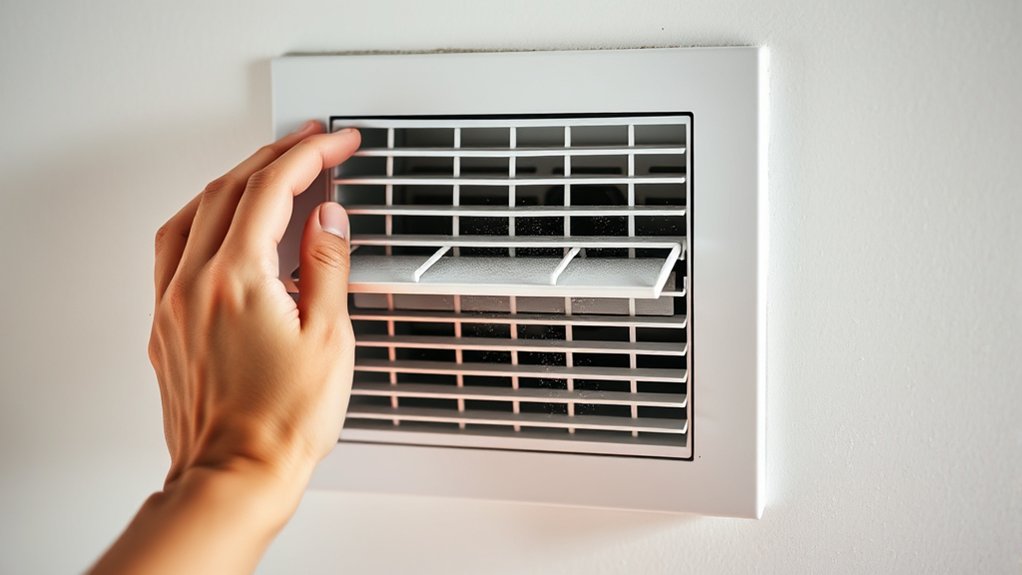
Put Vent Covers Back On Securely After Cleaning
Secure the vent covers firmly after cleaning to confirm ideal airflow and prevent dust infiltration. Proper reinstallation is essential to maintain your system’s efficiency and indoor air quality.
Firmly securing vent covers after cleaning ensures optimal airflow and protects against dust infiltration.
Follow these steps to put vent covers back on securely:
- Tighten all screws fully to hold the vent cover in place and eliminate gaps where dust might enter.
- Align the vent cover correctly with the wall or ceiling to guarantee proper airflow and a neat appearance.
- Use a level to confirm the vent cover is straight, preventing rattling noises and airflow disruption.
- Check that any gasket is intact and seated properly to create a tight seal against dust intrusion.
Change AC Air Filters After Cleaning Vents
After cleaning your AC vents, you should change the air filters promptly to prevent dust and debris from re-entering the system.
Dirty filters restrict airflow, which reduces HVAC efficiency and increases energy consumption. To keep things running smoothly, change your AC air filters every 1-3 months, especially right after vent cleaning.
This simple step helps improve indoor air quality by cutting down on allergens and pollutants. If you use high-efficiency filters, you’ll get even better air purity and comfort.
Changing your filters regularly also takes the pressure off your HVAC components, which can extend the system’s lifespan and help avoid costly repairs.
If you skip replacing the filters, it can undo all the good work you did cleaning the vents and mess with how well your system works overall.
Schedule Regular Vent Cleaning and Filter Changes
Because dust and debris continuously accumulate in your HVAC system, you should schedule vent cleaning at least twice a year to maintain ideal air quality and system efficiency.
Regular duct cleaning guarantees airflow isn’t obstructed, reducing strain on your system.
Coordinate vent cleaning with air filter changes every 1-3 months to prevent dust recirculation and optimize performance.
Follow these steps for effective maintenance:
- Schedule regular duct cleaning biannually, ideally before peak seasons.
- Replace air filters every 1-3 months, depending on usage and filter type.
- Keep a maintenance log to track cleaning and filter replacement dates.
- Combine cleaning and filter changes to guarantee thorough HVAC care and maximize system lifespan.
Sticking to this routine safeguards air quality and prolongs your AC’s efficiency.
It’s a simple way to keep things running smoothly and breathe easier indoors.
Frequently Asked Questions
How Often Should Professional AC Vent Cleaning Be Scheduled?
You should schedule professional AC vent cleaning at least once a year to keep your system running smoothly.
If you have pets, allergies, or live in a dusty area, consider cleaning every 3 to 6 months instead. Renovations are another reason to clean more often.
Keep an eye on dust buildup and any unusual odors. These can be good signs that it’s time to clean sooner rather than later.
Regular cleaning helps prevent clogs, improves the air quality in your home, and can extend the life of your HVAC system.
Can Cleaning Vents Reduce Energy Bills Significantly?
Yes, cleaning vents can greatly improve your energy efficiency. When vents are clear of dust and debris, your HVAC system doesn’t have to work as hard to circulate air, reducing energy consumption by up to 15%.
This efficiency not only lowers your energy bills but also extends the lifespan of your system.
Pairing vent cleaning with regular filter changes maximizes airflow, ensuring peak performance and cost savings over time.
It’s a simple step that can make a noticeable difference in how your system runs. Plus, it helps keep your home more comfortable year-round.
What Tools Are Best for Reaching Deep Inside Vents?
You’ll find vent brushes with long handles and soft bristles are ideal for reaching deep inside vents without causing damage.
Combine these with flexible cleaning wands to navigate bends and corners efficiently. An extendable microfiber duster also helps capture dust in tight spaces.
Using a vacuum with narrow hose attachments complements vent brushes by suctioning out debris.
This ensures thorough cleaning in hard-to-reach areas within your duct system. It’s all about using the right tools together to get the job done well.
Are There Any Health Risks From Cleaning AC Vents Improperly?
If you use improper techniques, you might as well be releasing a dust storm in your living room!
Improper techniques can stir up allergens, mold spores, and dust, which can worsen asthma or even cause respiratory infections.
You also risk damaging the ductwork, and that just invites more contaminants and costly repairs.
Always shut off the HVAC system before cleaning to avoid spreading particles.
Using proper methods not only protects your health but also helps maintain indoor air quality.
This way, you prevent serious risks from those hidden hazards lurking in your vents.
Can Pets Affect the Frequency of Vent Cleaning Needed?
Yes, pets definitely affect how often you need to clean your vents. Pet dander builds up in your air conditioner vents faster, which reduces airflow and makes indoor air quality worse.
You should clean vents every 3-4 months if you have pets, instead of the usual 6 months. Regular cleaning stops allergens from circulating around your home, which helps protect your respiratory health and keeps your system running efficiently.
And don’t forget to groom your pets regularly to keep dander from piling up inside your house. It really makes a difference!
Conclusion
By following these steps, you’ll give your AC vents a fresh breath, enhancing your indoor air quality and system efficiency. Think of this routine as a gentle reset for your home’s airflow. It helps prevent hidden buildup from quietly affecting comfort and health.
Regular care guarantees your system runs smoothly, saving energy and extending its life. Keep your vents in top shape, and you’ll enjoy a cleaner, cooler environment without the hassle. It’s a simple way to make your home more comfortable and efficient.