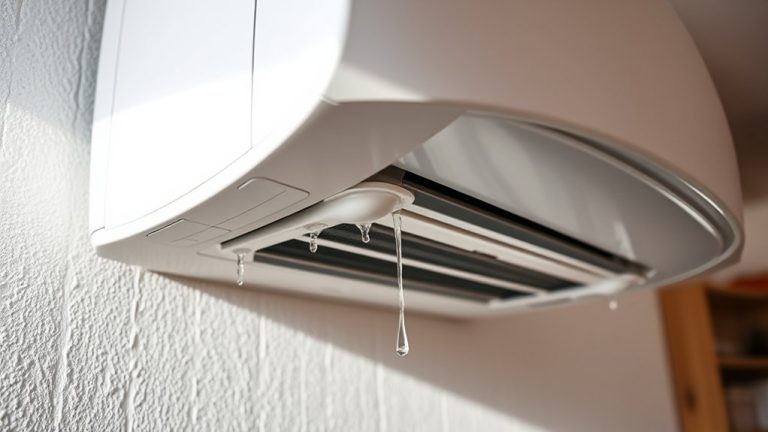
10 Easy Steps to Clean Air Conditioner Ducts
First, turn off your HVAC system to prevent dust from circulating. Gather essential tools like a vacuum with a hose, microfiber cloths, and a small brush. Remove and soak duct covers, then vacuum inside ducts, focusing on corners.
Next, inspect for mold, pests, or any signs of moisture. Wipe the covers before reinstalling them securely. Don’t forget to replace or clean air filters after cleaning to keep things running efficiently.
Finally, schedule regular HVAC maintenance to extend your system’s life. Following these steps guarantees cleaner air ducts and better air quality. If you want, there are more details available for thorough upkeep.
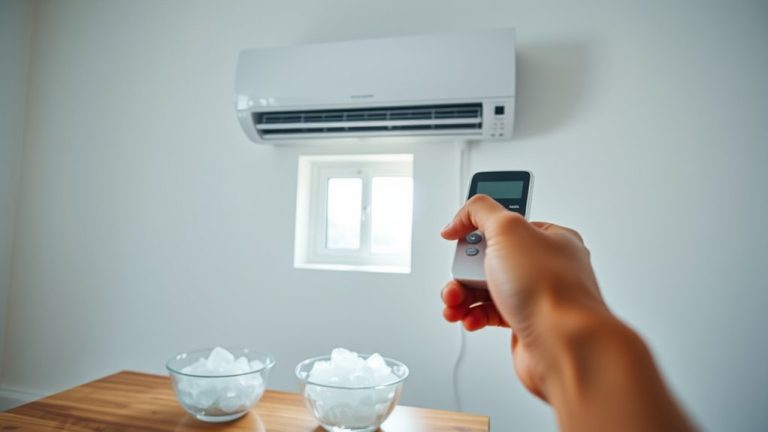
Turn Off Your HVAC System Before Cleaning
Before you begin cleaning your air conditioner ducts, always turn off your HVAC system. This step is essential for safety and helps prevent accidental activation while removing duct covers.
Plus, turning off your HVAC system stops dust and debris from circulating throughout your home during the cleaning.
Without the system running, you avoid airflow that could blow residual dust back into the air, allowing it to settle properly. This pause also lets you accurately assess the condition of the ducts without interference from moving air.
Make sure the system stays off for several minutes before you start to enhance your ability to inspect and clean thoroughly.
By turning off your HVAC system methodically, you control dust spread and keep a safe environment during the entire duct cleaning process.
It’s a simple step, but it makes a big difference.
Gather Essential Tools for Duct Cleaning
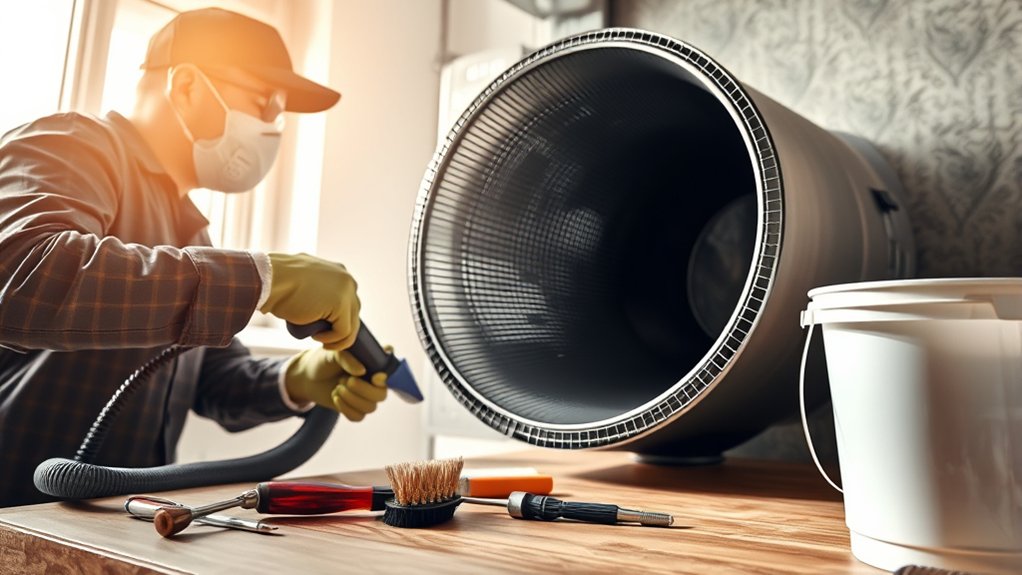
To clean your air conditioner ducts efficiently, gather five essential tools: a vacuum with a hose attachment, microfiber cloths, a small brush, protective gear, and a power drill.
The vacuum’s hose attachment is crucial for removing dust deep within the ducts, while microfiber cloths help wipe surfaces without redistributing dust.
Use a cleaning brush, like a small or toilet brush, to loosen stubborn debris before vacuuming.
Protective gear, including a dust mask and gloves, prevents inhalation of allergens and protects your skin during air duct cleaning.
Finally, a power drill allows you to remove vent covers and duct grilles quickly, providing better access for thorough cleaning.
These tools form the foundation for effective DIY methods in air duct cleaning. Easy, right? Just gather these, and you’re good to go!
Inspect for Mold and Pest Signs While Cleaning

While cleaning your air conditioner ducts, carefully inspect for mold and pest signs. These issues can compromise air quality and system efficiency.
Start by detecting musty odors that might indicate mold growth within the duct system.
Next, take a close look at the duct surfaces for any visible mold discoloration or slimy textures. Check for moisture problems by looking for damp spots or condensation since these conditions encourage mold and attract pests.
Also, keep an eye out for pest signs like droppings or nests near the ductwork. If you notice any increased respiratory issues among occupants, it could be a sign of contamination.
If you find visible mold, persistent moisture, or pests, don’t hesitate to call in a professional. Getting expert help quickly ensures proper cleanup and helps avoid further damage to your HVAC system.
Remove Air Duct Covers and Vent Grilles
Start by removing the air duct covers and vent grilles using a power drill or screwdriver. Wear protective gear, including gloves and a dust mask, to prevent inhaling dust and debris. Carefully unscrew all screws or fasteners, placing them in a labeled container to avoid loss.
Once removed, soak the covers and grilles in a cleaning solution for a thorough clean. Before reinstallation, inspect duct covers for signs of mold or damage and replace if necessary.
| Step | Purpose |
|---|---|
| Remove air duct covers | Gain interior access |
| Soak in cleaning solution | Remove accumulated dirt |
| Inspect duct covers | Detect signs of mold or damage |
This method guarantees safety and effective preparation for cleaning.
Vacuum Inside the Air Ducts to Remove Dust
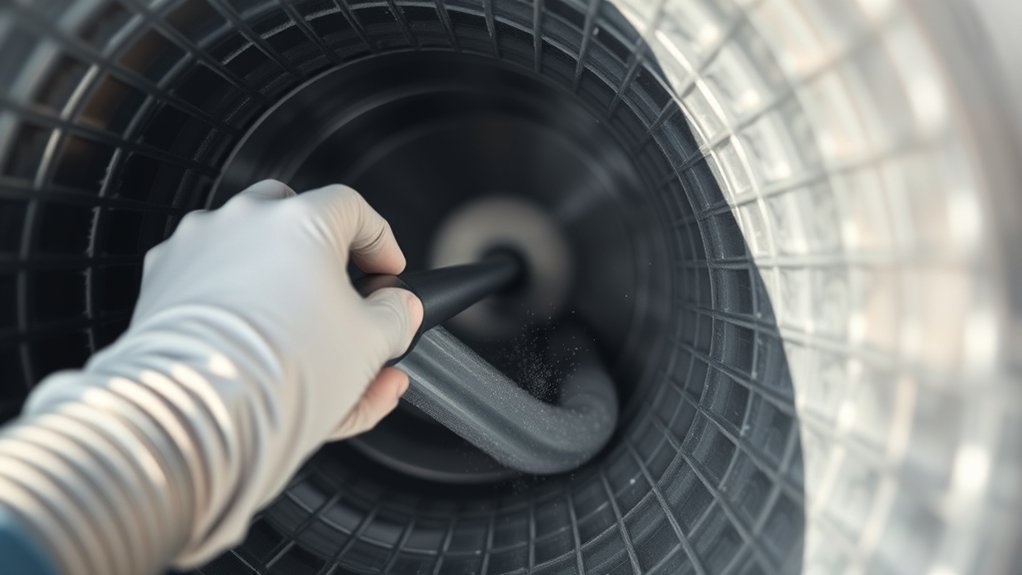
Before you start vacuuming, make sure to turn off your HVAC system. This helps prevent dust from spreading around while you clean.
Grab a shop vacuum with a hose attachment—that way, you can reach deep inside the ducts. You might also want to add a brush or nozzle to help loosen any stubborn debris.
Don’t forget to focus on the corners and bends. These spots often trap dust, so giving them extra attention ensures you get all parts of the ducts nice and clean.
Choosing The Right Vacuum
Because effective dust removal depends on suction power, you need to select a vacuum designed for air duct cleaning. Opt for a vacuum cleaner with strong suction power to efficiently extract dust and debris lodged inside ducts. A shop vacuum is ideal, as it handles larger debris while maintaining consistent suction.
Make sure the unit includes a HEPA filter to trap fine particles. This helps enhance air quality by preventing dust from recirculating. Use a flexible hose attachment to reach bends and corners within the ductwork. That way, you can clean those hard-to-reach spots thoroughly.
Also, remember to regularly inspect and clean the vacuum’s filters and canister during use. This keeps your vacuum working at its best.
Choosing the right vacuum with these features guarantees effective dust removal and supports better air conditioner duct hygiene.
Effective Dust Removal Techniques
One essential step in effective dust removal involves using a standard or shop vacuum with a hose attachment to reach deep inside your air ducts and extract accumulated dust and debris.
Before vacuuming, turn off your HVAC system to prevent dust from circulating back into your home. Remove vent covers with a screwdriver to access duct interiors thoroughly.
Use a small brush to dislodge stubborn dust buildup, enhancing vacuum efficiency. Vacuum both ducts and vent covers carefully to guarantee a thorough clean.
Regular cleaning of air ducts reduces dust buildup, which improves air quality and promotes energy savings by maintaining HVAC system efficiency.
While vacuuming is effective, professional cleaning may be necessary for extensive buildup or hard-to-reach areas.
Consistent maintenance guarantees your air ducts stay clean and functional. Keeping up with this routine really pays off in the long run.
Loosen Stubborn Dust With Brushes in Ducts
Grab a small, stiff-bristled brush, like a toilet brush, to gently loosen stubborn dust and debris clinging to the duct walls. Start cleaning at the farthest point of the air ducts and brush your way toward the vent. This helps stop dust from settling back on surfaces you’ve already cleaned.
Make sure you wear protective gear, such as gloves and a dust mask, so you don’t inhale any particles while working. Once the dust is loosened, use a vacuum with a hose attachment right away to suck up the debris. This step helps improve your system’s efficiency and keeps the air circulating clean.
Don’t forget to check and clean your brush regularly. This keeps it effective and prevents dust from spreading between different parts of the duct.
Following this method ensures you get rid of stubborn dust and keeps your HVAC running smoothly with better indoor air quality.
Wipe Down Vent Covers and Nearby Surfaces
Before cleaning vent covers and nearby surfaces, turn off your HVAC system to prevent dust from circulating. To maintain indoor air quality and reduce allergens, follow these steps to wipe down vent covers and surrounding areas:
First, use a damp microfiber cloth to wipe down vent covers. This helps remove surface dust buildup efficiently. For a deeper clean, unscrew the vent covers and soak them in warm soapy water. Then rinse and dry them completely.
Next, clean the surrounding areas with a soft brush to get rid of any leftover dust that might block airflow.
Once everything is dry, reinstall the vent covers securely. This helps keep your system running efficiently.
Doing this regularly not only maintains good airflow but also reduces allergens and keeps your HVAC system performing well. It’s a simple routine that really pays off in the long run!
Replace or Clean Air Filters After Duct Cleaning
After you’ve cleaned your air ducts, it’s a good idea to replace or clean your air filters. This helps stop dust and allergens from floating back into your home.
Make sure to pick the right type of filter—HEPA filters are great if you want to catch more particles.
And try to stick to a regular schedule for changing or cleaning them, usually every 1 to 3 months.
Doing this keeps the airflow at its best, makes your HVAC system run more efficiently, and can even help it last longer.
Importance Of Filter Replacement
Replacing or cleaning your air filters regularly is essential to maintaining the efficiency of your HVAC system following duct cleaning.
After professional duct cleaning, you must replace filters promptly to prevent dust and debris from re-entering the system. This can degrade indoor air quality and reduce energy efficiency.
To keep your system running smoothly, follow these simple steps:
- Inspect air filters immediately after cleaning air ducts.
- Replace standard filters every 1 to 3 months; HEPA filters up to 6 months.
- Monitor filter condition to reduce allergens and pollutants circulating indoors.
- Maintain the HVAC system by ensuring filters are clean to avoid airflow restrictions and system strain.
Choosing The Right Filters
Selecting the right air filter plays a critical role in maintaining both airflow efficiency and indoor air quality following duct cleaning. You should choose air filters with an appropriate MERV rating, typically between 8 and 12 for residential HVAC systems, to balance filtration and airflow.
HEPA filters offer superior particle capture, removing 99.97% of particles as small as 0.3 microns. They’re ideal for sensitive environments.
After duct cleaning, always replace air filters to prevent residual dust and allergens from re-entering the system.
Washable filters can be a cost-effective alternative but require regular cleaning to maintain performance.
Proper selection and maintenance of air filters guarantee your HVAC system runs efficiently while maximizing indoor air quality by minimizing dust, allergens, and other contaminants.
Frequency Of Filter Cleaning
One essential step to maintaining ideal airflow and indoor air quality is to replace or clean your air filters immediately following duct cleaning. This guarantees your HVAC system operates efficiently and delivers clean air throughout your home.
To maintain peak performance and reduce allergens, follow these filter maintenance guidelines on a regular basis:
- Inspect air filters monthly and replace or clean every 1 to 3 months depending on usage and filter type.
- Use HEPA filters for enhanced allergen capture, especially if pets or allergy sufferers are present.
- Coordinate filter maintenance with professional service inspections, ideally in spring and fall.
- Replace filters sooner if they appear clogged to prevent strain on your HVAC system and preserve indoor air quality.
Sticking to this schedule really helps you get the most out of your air duct cleaning and keeps the air circulating clean and fresh all year round.
Reinstall Duct Covers and Secure Them Properly
Align each duct cover carefully with its corresponding opening to maintain proper airflow efficiency. Before you reinstall duct covers, inspect them for wear or damage. Replace any compromised covers to guarantee a good seal.
Position each cover in the correct orientation to support ideal air distribution within the HVAC system. Use a power drill to fasten the duct covers securely to the duct openings, eliminating gaps that could reintroduce dust and contaminants.
Tighten all screws or fasteners adequately to avoid vibrations that cause noise or dislodgement during operation. By securing them properly, you preserve system integrity and maintain consistent airflow efficiency throughout your air conditioning ducts.
This methodical approach guarantees your HVAC system operates reliably and delivers clean, conditioned air effectively.
Schedule Regular HVAC Maintenance to Keep Ducts Clean
Regularly scheduling HVAC maintenance twice a year, ideally in spring and fall, guarantees your duct system stays clean and functional. This proactive approach helps you address duct cleaning needs before dust and debris accumulate, ensuring peak performance.
During professional inspections, technicians identify hidden issues such as mold or pest infestations that could compromise your system. Consistent maintenance also reduces strain on your HVAC, lowering energy bills.
When you schedule regular HVAC maintenance, make sure to:
- Replace air filters to maintain optimal airflow.
- Inspect ductwork for signs of damage or buildup.
- Conduct professional inspections to detect hidden problems.
- Clean ducts as needed to enhance air quality and system efficiency.
This routine not only enhances air quality but also helps extend the lifespan of your system and prevent costly repairs.
It’s definitely worth making it a regular part of your home care.
Frequently Asked Questions
How Often Should Air Conditioner Ducts Be Professionally Cleaned?
You should schedule duct cleaning every 3 to 5 years, but it’s a good idea to adjust this based on signs like mold, pests, or unusual odors.
Regular cleaning really helps improve air quality and boosts your HVAC system’s efficiency. So, there are clear benefits to keeping your ducts clean.
It’s also smart to do seasonal maintenance, including annual inspections. While DIY cleaning can handle surface dust, hiring professionals ensures the job is thorough.
Plus, professionals can help you understand the cost-effectiveness of cleaning.
Don’t forget about the environment! Choosing eco-friendly cleaning services can help maintain your system’s longevity and keep your indoor air healthy.
Can Duct Cleaning Reduce Allergy Symptoms?
Yes, duct cleaning can reduce allergy symptoms by removing key allergy triggers like dust accumulation, pet dander, and mold growth from ventilation systems. This improves air quality and minimizes sinus issues linked to seasonal changes.
By eliminating contaminants, duct cleaning supports better asthma management and reduces airborne irritants. Regular maintenance prevents buildup that worsens symptoms, allowing your respiratory system to function more efficiently.
Plus, keeping your ducts clean helps your environment stay healthier overall. It’s a simple step that can make a big difference in how you breathe every day.
Are There Any Health Risks Associated With Dirty Air Ducts?
Yes, dirty air ducts can pose health risks by reducing air quality through dust accumulation, mold growth, and increased allergen exposure.
These contaminants can trigger respiratory issues, worsen asthma, and cause fatigue or headaches.
Keeping your air ducts clean is important. Maintaining a regular cleaning schedule improves energy efficiency and provides health benefits by minimizing these risks.
Using effective cleaning methods tailored to your ducts helps you know the best maintenance frequency.
This way, you preserve both your system’s performance and your indoor environment’s safety.
Is Duct Cleaning Necessary for All Types of HVAC Systems?
Duct cleaning benefits all HVAC systems, though many think it’s only for forced-air setups. That’s a common misconception.
You should watch for signs of contamination like dust buildup or mold because neglect can impact efficiency and indoor air quality.
While DIY cleaning tips can help maintain ducts, seasonal maintenance and choosing professionals guarantee thorough care.
Environmental considerations also matter since they keep your system eco-friendly.
What Is the Average Cost of Professional Duct Cleaning?
The average cost of professional duct cleaning ranges from $300 to $700, influenced by factors like duct size, contamination level, and local pricing.
You’ll gain air quality improvements and energy savings by choosing professionals who use specialized equipment.
For seasonal maintenance, it’s a good idea to schedule service every 3 to 5 years.
While DIY cleaning tips can help, professionals guarantee thorough results.
Make sure to evaluate the benefits of duct cleaning carefully and compare quotes to find the best provider for your needs.
Conclusion
By following these 10 steps, you’ll transform your air conditioner ducts from dust traps into pristine airflow channels. It’s almost like giving your HVAC system a full medical check-up.
Neglecting this could turn your ducts into a breeding ground for allergens and pests. That can drastically reduce efficiency.
Don’t wait for your air quality to plummet. Clean those ducts methodically and your system will thank you with peak performance and longer life.