7 Easy Steps to Clean Air Conditioner Coils
To clean your air conditioner coils, first turn off power at the thermostat and circuit breaker. Then, remove the outer cover to access the coils. Take a good look at the coils for any dirt, debris, or damage.
Next, apply a foaming coil cleaner evenly and let it soak for 5 to 10 minutes. After that, rinse the coils gently with a hose. If you notice any bent fins, straighten them carefully with a fin comb.
Finally, reassemble the unit with care. Restore power and test your AC to see if the cooling has improved. Following these steps will help you clean your coils effectively and keep your AC running at its best.
If you want, there’s more detailed guidance available to walk you through the process.
Prepare the AC Unit and Turn Off Power
Before you begin cleaning your air conditioner coils, make certain you turn off the power at both the thermostat and the circuit breaker to eliminate any risk of electrical shock.
To properly prepare the AC unit, first clear any surrounding vegetation or debris, maintaining at least a two-foot clearance to optimize airflow.
Clear surrounding plants and debris, keeping a two-foot space for optimal airflow around your AC unit.
If you have a window AC unit, remove it from the window and place it on a flat surface outdoors for easier access.
Use a screwdriver to remove the outer cover carefully, storing screws in a safe container to avoid loss.
When you pull off the fan assembly, support any electrical connections to prevent wiring damage.
These steps guarantee a safe and effective cleaning process by securing power and protecting essential components before accessing the coils.
It’s really important to take your time here, so you don’t accidentally damage anything.
Once everything is prepped, you’re good to go!
Remove Outer Cover to Access AC Coils
Before you start, make sure the power is completely turned off at both the thermostat and the circuit breaker to ensure your safety.
Next, grab the right screwdriver or nut driver and carefully remove all the screws holding the outer cover in place.
Be sure to keep those screws somewhere safe so you don’t lose them when it’s time to put everything back together.
Power Off Safety
While guaranteeing your safety, always turn off the power to the air conditioning unit at both the thermostat and circuit breaker before you start cleaning.
This power off safety step prevents electrical shock and damage during maintenance.
After confirming power is off, use a screwdriver to carefully remove the outer cover, setting screws aside securely.
If your unit has a fan assembly, gently detach it while supporting any electrical connections to avoid strain or disconnection.
Once the cover is removed, inspect the coils for visible damage or dirt buildup that requires cleaning.
Keeping the area clear of debris improves airflow and access.
Removing Cover Screws
After confirming the power to your air conditioning unit is completely off, you can begin removing the outer cover to access the coils. Start by locating all screws securing the outer cover on your AC unit. Use a screwdriver or nut driver to carefully remove these screws, placing them safely aside for reassembly.
If screws are rusted, apply penetrating oil and wait a few minutes to ease removal. Gently lift off the cover, avoiding disturbance to electrical connections or fan assemblies. This step is essential for proper maintenance and rehabilitating your AC unit’s efficiency.
| Step | Details |
|---|---|
| Turn off power | At thermostat and circuit breaker for safety |
| Locate screws | Check top and sides of the unit |
| Remove screws | Use screwdriver or nut driver carefully |
| Lift outer cover | Avoid damaging internal parts |
Inspect AC Coils for Dirt and Damage
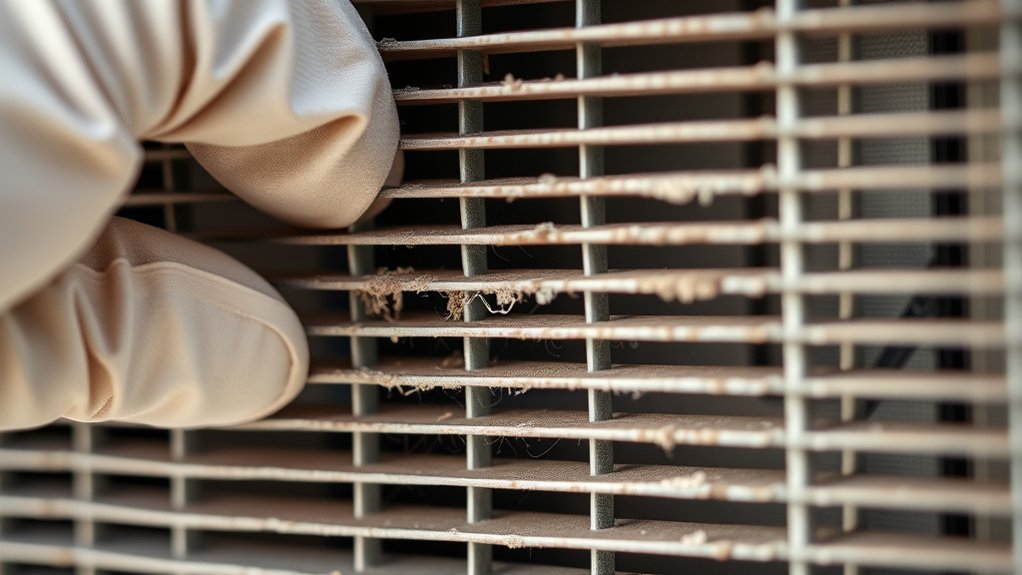
You should start by taking a good look at the coils to check for any dirt or debris. This stuff can really cut down on how well the coils transfer heat.
It helps to grab a flashlight so you can spot any bent fins or signs of corrosion. These issues might block airflow or point to damage.
Catching them early is key—it keeps your cooling running smoothly and can save you from expensive repairs down the line.
Visual Dirt Assessment
Because dirt and debris buildup can greatly reduce your air conditioner’s efficiency, you should regularly inspect the coils for visible contamination.
Begin by performing a flashlight inspection to illuminate all coil surfaces, including hard-to-see areas, guaranteeing no visible dirt or debris is missed.
Carefully inspect AC coils for signs of corrosion, bent fins, mold, or mildew, especially in humid environments.
These issues impair cooling efficiency and indoor air quality. Identifying and addressing visible dirt promptly through regular cleaning helps maintain peak airflow and prevents overheating.
Neglecting to clean the coils can increase energy costs and accelerate system failure.
Damage Identification Methods
When inspecting AC coils, identifying both dirt buildup and physical damage is essential for maintaining peak performance. Use damage identification methods to inspect the AC coils thoroughly. Look for visible dirt buildup that obstructs airflow and reduces cooling efficiency.
Check for bent fins, which cause airflow obstruction, and examine coil surfaces for corrosion or rust, signaling possible leaks. Use a flashlight for a thorough inspection of hard-to-see areas.
Monitor for unusual noises or reduced cooling efficiency, as these symptoms often indicate coil damage. Promptly cleaning AC coils and addressing damage maintains system efficiency.
| Issue | Indicator |
|---|---|
| Visible Dirt Buildup | Dark, dusty coil surfaces |
| Bent Fins | Misaligned or crushed fins |
| Corrosion or Rust | Brown/orange discoloration |
| Unusual Noises | Clicking or rattling sounds |
| Reduced Efficiency | Longer cooling cycles |
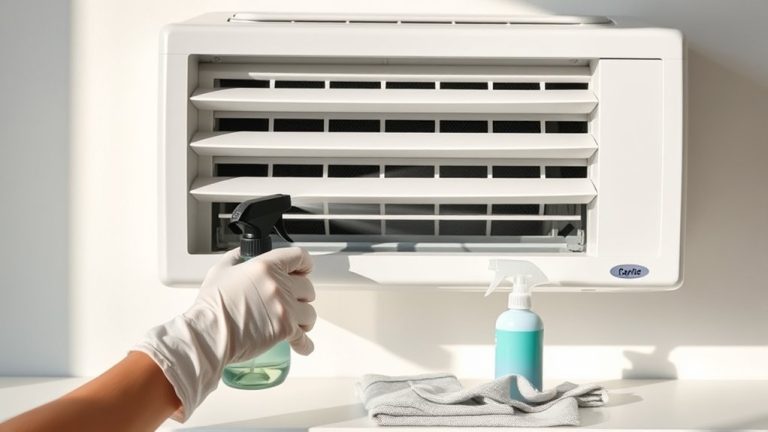
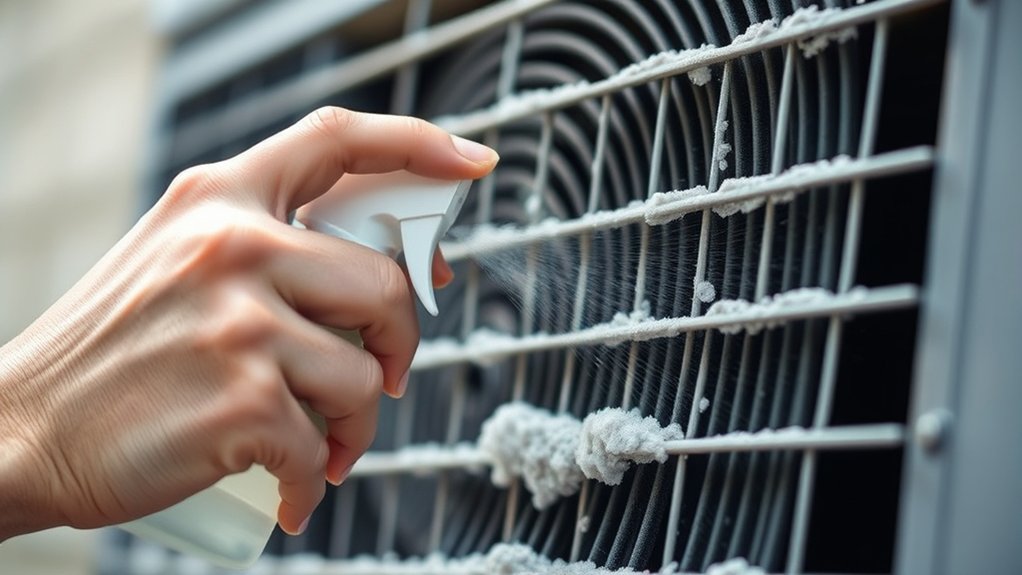
Apply Coil Cleaner and Let It Soak
Spray a foaming coil cleaner evenly across the wet coils to guarantee full coverage, which is essential for breaking down grime effectively. When you apply coil cleaner, make sure the entire surface is coated to maximize grime removal.
Let the foaming cleaner soak for 5 to 10 minutes, allowing it to penetrate and loosen dirt buildup thoroughly. If the cleaner starts dripping off, just reapply to maintain effective coverage and guarantee thorough cleaning.
The foam lifts debris, targeting stubborn grime within the coil fins, which directly impacts airflow efficiency. After soaking, the cleaner will begin breaking down contaminants, preparing the coils for the next step.
Proper application and soak time are critical maintenance tasks that prevent residual foam buildup and keep your system running smoothly. It’s all about giving the cleaner enough time to work so your coils stay in top shape.
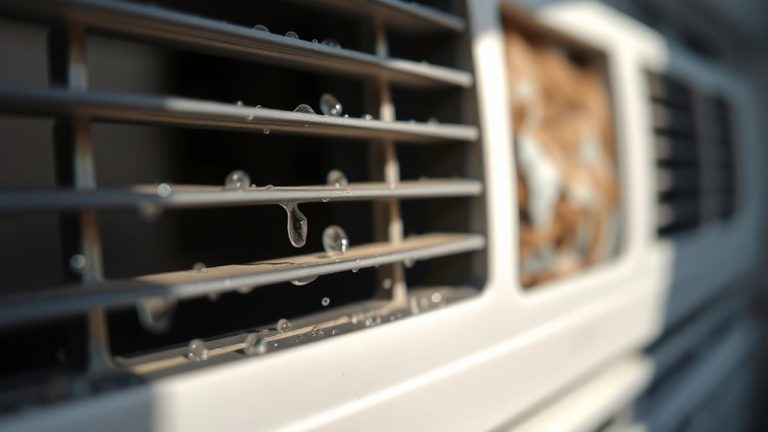
Rinse Coils and Straighten Bent Fins
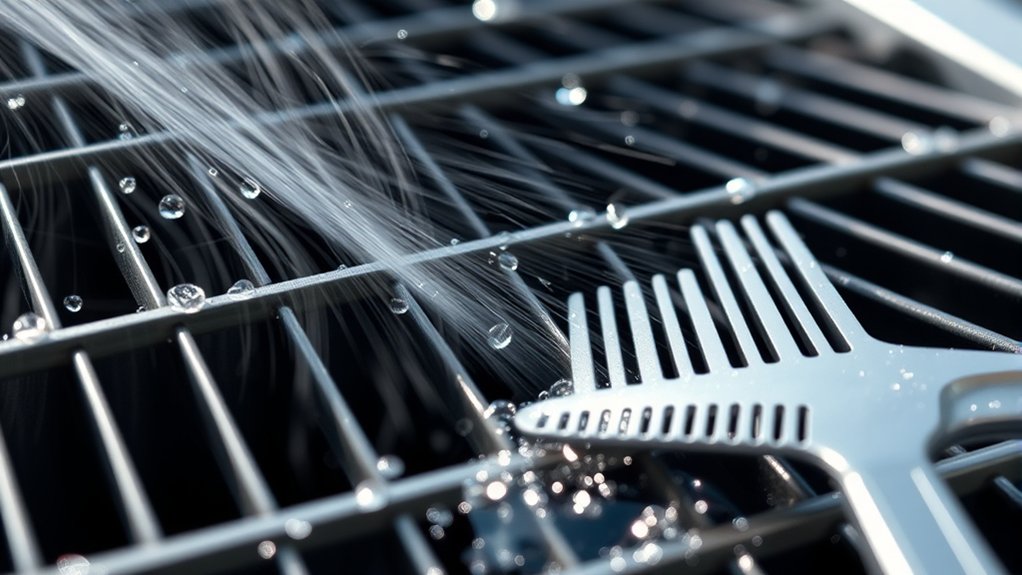
Once the coil cleaner has soaked and loosened the grime, you need to rinse the coils thoroughly to remove all residues. Use a garden hose with a gentle spray setting, directing water from the inside out to avoid pushing dirt deeper into the air conditioner. This careful rinsing prevents damage to the delicate fins and coils.
Next, inspect the coils for bent aluminum fins. Use a fin comb to straighten bent fins carefully, restoring proper airflow and enhancing efficiency.
Regular maintenance by rinsing coils and straightening fins improves heat exchange, ensuring your air conditioner runs at peak performance and extends its lifespan.
Routine coil care boosts heat exchange, maximizing your air conditioner’s efficiency and longevity.
Try to incorporate this cleaning process into your routine at least once a year. If you’re in a dustier environment, you might want to do it more often to keep everything running smoothly.
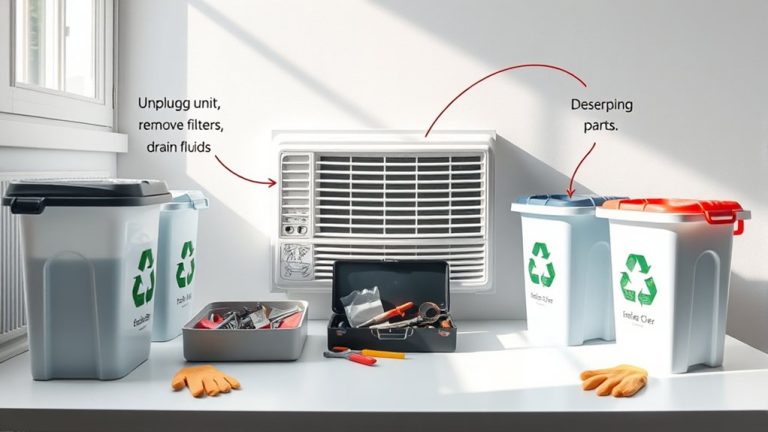
Reassemble the Unit Carefully
Begin reassembling the air conditioner by carefully aligning all components, such as the fan assembly and covers, to guarantee proper fit and function.
Follow the reverse order of your disassembly, making sure you don’t miss any parts critical to operation. Secure each component using the original screws, tightening them firmly but avoiding over-tightening, which can damage parts.
Pay special attention to reconnecting all electrical connections correctly to prevent operational issues or safety hazards.
After reassembly, thoroughly inspect the entire unit for any leftover tools, debris, or loose components that could affect performance.
This careful reassembly is essential for effective air conditioner maintenance and helps ensure your unit operates reliably without unexpected failures.
Taking your time here really pays off in the long run.
Restore Power and Test AC Cooling
After completing the coil cleaning and careful reassembly, you should restore power to the air conditioner by switching on the circuit breaker and adjusting the thermostat settings.
Once powered, allow the unit to run for several minutes to test AC cooling functionality.
Keep an ear out for any unusual sounds. These might mean something wasn’t put back together right or that the unit needs more maintenance.
Also, check if the air coming from the vents feels colder than before you cleaned the coils.
Over the next month, keep an eye on your energy bills to see if your efficiency has improved and your consumption has gone down.
Regularly monitoring your air conditioner after cleaning the coils helps keep it running at its best.
Plus, it makes it easier to spot any problems early, which keeps the system reliable and can extend its lifespan.
Frequently Asked Questions
How Often Should Air Conditioner Coils Be Cleaned?
You should schedule coil cleaning frequency at least once a year for ideal summer maintenance.
If you live in dusty areas or have pets, consider cleaning 2-4 times annually.
Use DIY cleaning methods for light maintenance but follow professional service recommendations if you notice common coil issues or signs of neglect.
Incorporate coil cleaning into your seasonal preparation checklist to boost energy efficiency benefits, improve indoor air quality, and support preventive maintenance strategies.
Keeping up with this simple task can make a big difference in how well your air conditioner performs.
Plus, it helps you avoid costly repairs down the road.
Can I Use Household Cleaners on AC Coils?
Think of your AC coils as delicate flowers in a garden; household cleaners are like harsh frost that can wither them. You shouldn’t use typical household cleaners for coil cleaning because their chemicals can corrode coils and reduce coil efficiency.
Instead, opt for eco-friendly cleaning solutions made for AC maintenance.
Following proper DIY methods and chemical safety guidelines guarantees your coils stay healthy, maintains cleaning frequency, and keeps your system running smoothly without voiding warranties.
What Signs Indicate Coil Damage Needing Professional Repair?
You’ll notice coil corrosion or rust formation, which weakens the system and signals repair needs.
Refrigerant leaks cause cooling inefficiency and airflow problems, while ice buildup on coils indicates serious issues.
Frequent cycling and unusual noises often suggest electrical issues or mechanical faults.
Mold growth inside the unit also points to moisture problems affecting coil function.
If you spot any of these signs, call a professional for prompt coil inspection and repair.
Does Cleaning Coils Affect My AC Unit’s Warranty?
Think of your AC coils as the heart of your unit; neglecting them can strain your system.
Regular coil maintenance through proper DIY cleaning or professional services won’t void your warranty coverage if you follow manufacturer guidelines.
Maintaining cleaning frequency and keeping detailed maintenance records during seasonal checks guarantees efficiency impact stays positive and protects your warranty.
Ignoring these steps risks warranty void, so always review terms and document your care diligently.
Are There Health Risks From Dirty AC Coils?
Yes, dirty AC coils negatively impact indoor air quality by promoting dust accumulation and mold growth. This can trigger allergy symptoms and respiratory issues.
Elevated humidity levels from inefficient cooling foster moisture build-up, which only makes the health risks worse. Keeping your coils clean helps avoid that.
Maintaining clean coils also improves energy efficiency, reduces system strain, and extends your system’s lifespan.
So, regular maintenance is definitely worth it.
Make sure to include moisture control and coil cleaning in your routine to keep your AC running at its best and protect your health.
Conclusion
By following these seven steps, you not only clean your AC coils but also extend your unit’s lifespan. This can save you money on costly repairs down the line. When you prepare properly and apply the right cleaner, you set yourself up for success.
Carefully reassembling the unit helps secure ideal airflow and efficiency. It’s no coincidence that well-maintained coils lead to better cooling performance. Taking these precise actions ensures your AC runs smoothly.
This keeps your environment comfortable and your energy bills in check. It’s really all about a little care making a big difference. You’ll notice the benefits in no time.