10 Easy Steps to Install a Window Air Conditioner
To install a window air conditioner, first choose the right size by calculating your room’s square footage and BTU needs. Confirm your electrical system supports the unit’s voltage with a dedicated circuit. Gather tools like a tape measure, screwdriver, and brackets.
Measure and prepare your window, then carefully lift and position the AC, guaranteeing a slight tilt for drainage. Secure it with brackets and weatherstripping. Plug it in, and test operation.
Following these steps guarantees efficient setup. Now, you can explore how to maintain peak performance next.
Choose the Right Window AC Size for Your Room
To choose the right window AC size for your room, start by calculating the square footage. Just multiply the length by the width.
Once you have this number, check out a BTU chart to find the right cooling capacity. Generally, you’ll need about 20 BTUs per square foot.
For example, rooms up to 150 square feet require roughly 5,000 BTUs. Spaces between 150 and 300 square feet need closer to 7,000 BTUs.
Keep in mind, you’ll want to adjust the BTU rating based on things like sunlight exposure. If your room gets plenty of sun, add about 10%.
Also think about additional people in the room. You should add roughly 600 BTUs per person.
Avoid going for oversized units because they cool the room too quickly but don’t remove humidity well.
Lastly, double-check that the window AC unit’s physical size fits your window properly to keep things efficient.
Check Electrical Requirements Before Installation
Before you install your window air conditioner, it’s important to double-check that your electrical system matches the unit’s voltage requirements. Usually, smaller models need 115V, while larger ones require 220V.
Also, make sure the AC is plugged into a dedicated circuit that’s rated for its amperage. This helps prevent overloads and keeps your breakers from tripping unexpectedly.
And one more thing—never use extension cords. They can cause power drops and even create serious fire hazards. Better to keep things safe and simple!
Voltage Compatibility Check
One critical step in installing your window air conditioner is verifying the voltage compatibility between the unit and your home’s electrical system.
Confirming the power supply matches your AC’s voltage requirements is essential for safety and performance. Follow these steps precisely:
First, identify the unit’s voltage requirements. It’s typically 115V for smaller models and 220V for larger ones.
Next, make sure your home’s outlet matches this voltage and can handle the necessary amperage.
Also, check that the outlet is grounded to prevent electrical hazards and ensure proper operation.
And here’s a tip: avoid using extension cords. Instead, plug the AC directly into a properly rated, dedicated circuit to keep the power stable and safe.
Dedicated Circuit Necessity
Three key electrical factors determine whether your home can safely support a window air conditioner: voltage, amperage, and circuit exclusivity.
Using a dedicated circuit is vital to guarantee your unit receives consistent power without overloading your electrical system.
Smaller units typically require a 115V outlet on a 15-amp dedicated circuit, while larger models demand a 220V outlet with a 20-amp dedicated circuit.
Sharing circuits can cause blown fuses or tripped breakers, which disrupt operation and risk damage.
For proper installation, always consult the manufacturer’s electrical specifications and verify your home’s wiring can handle the load.
Following these safety precautions prevents electrical hazards and promotes efficient, reliable cooling performance throughout the season.
Avoid Extension Cords
Avoiding extension cords during your window air conditioner installation is essential to guarantee safety and peak performance.
Using the right tools and confirming the electrical outlet meets specifications prevents hazards and inefficiencies. Here’s what you need to focus on:
First, confirm the outlet voltage matches your AC unit. It’s typically 115V for smaller models and 220V for larger ones.
Next, verify the outlet amperage rating—15 amps for smaller units and 20 amps for larger ones.
Also, use a dedicated circuit to prevent overloads, blown fuses, or tripped breakers.
And seriously, avoid extension cords altogether. They can’t reliably support the power load and only increase fire risk.
Following these precise electrical requirements guarantees your window AC installation is safe, compliant, and efficient. It’s worth taking the time to get it right!
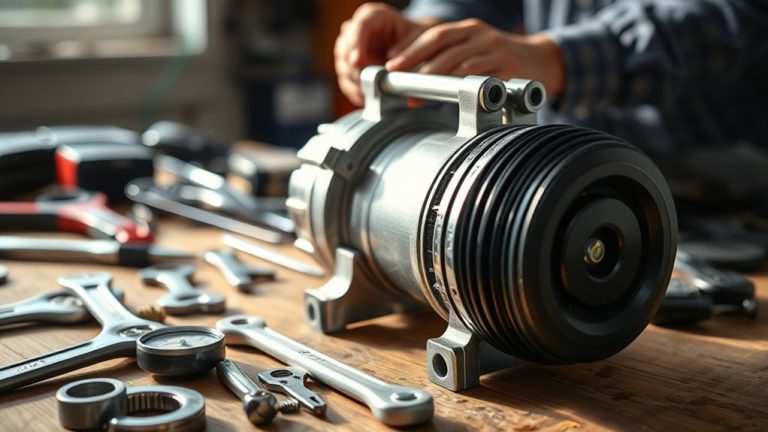
Gather Your Tools and Materials
You’ll want to have some essential tools on hand, like a tape measure, level, screwdrivers, and a cordless drill.
These will help make sure your installation is accurate and smooth.
Next, gather your materials—think foam weatherstripping, screws, and L-brackets.
These items are key to securing and insulating the unit properly.
And don’t forget, always follow safety guidelines when using your tools.
It’s the best way to avoid injury and stay in control throughout the whole process.
Essential Tools Checklist
To guarantee a smooth window air conditioner installation, gather essential tools such as a measuring tape, screwdriver, cordless drill, level, and foam weatherstripping. Having these on hand guarantees accuracy and efficiency during setup.
Here’s a concise checklist of what you need:
- Measuring tape for precise window dimensions and unit fit.
- Screwdriver and cordless drill to secure brackets and mounting screws.
- Level to guarantee the unit is perfectly horizontal, preventing water leakage.
- Foam weatherstripping to seal gaps and improve insulation around the air conditioner.
Prepare all essential tools before you start to avoid interruptions.
If you’re new to DIY, consider a power tool starter kit; it includes everything needed for this and future projects.
Material Preparation Tips
Gathering all necessary tools and materials before installation sets the foundation for a seamless and efficient window air conditioner setup. Follow these material preparation tips to streamline your process.
Collect essential tools such as a screwdriver, cordless drill, level, and tape measure to guarantee precise alignment and secure mounting.
Prepare installation materials including foam weatherstripping, screws, L-brackets, and support brackets to properly fasten the window AC unit. Keep scissors or a utility knife nearby for trimming insulation or weatherstripping as needed.
If you’re new to these tasks, a power tool starter kit can simplify your work and prevent last-minute store runs.
Verifying all tools and installation materials beforehand prevents interruptions and helps maintain an efficient workflow throughout your window AC unit’s installation.
It’s much easier to have everything ready before you start rather than stopping halfway through to find what you need. So, take a little extra time upfront—it’ll pay off in the end!
Tool Safety Guidelines
Although having the right tools is essential, confirming they’re in good working condition and using proper safety gear like gloves and goggles is equally important to prevent injuries during your window air conditioner installation.
Adhering to strict tool safety guidelines maximizes efficiency and safety.
First, verify all tools, such as screwdrivers, cordless drills, and tape measures, are in good working condition to avoid malfunctions.
Next, wear proper safety gear, including gloves and goggles, to protect against sharp edges and debris.
Also, keep a clean and organized workspace to prevent tripping hazards and allow quick access to tools and materials.
Don’t forget to review the manufacturer’s instructions for any specialized tools required for your specific AC model.
Following these steps helps ensure a smooth, safe installation process while minimizing risks and delays.
It’s all about being prepared and cautious to get the job done right.
Measure Your Window for Proper AC Fit
Accurately measuring your window’s inside width and height is essential to confirm a secure fit for your air conditioner. Start by using a tape measure to determine the exact dimensions of the window opening, focusing on the inside of the window frame.
Standard window AC units require a window opening between 22 to 36 inches wide, but always verify the manufacturer’s specifications for your specific model.
Most standard window AC units fit openings 22 to 36 inches wide; always check your model’s specs.
When measuring, make sure you account for any obstructions like sills or security bars that may interfere with installing a window AC.
Also, confirm the window frame can support the unit’s weight. Heavier models might need additional brackets.
Precise measurements help you measure your window for proper AC fit, ensuring a stable installation and maximum performance.
Taking a little extra time now can save you headaches later.
Clean and Prepare Your Window for Installation

Before installing your window air conditioner, clean the window sill and frame thoroughly to guarantee a tight seal that prevents drafts and insect entry. A clean filter helps maintain overall performance, but a properly prepared window sill is critical to prevent air leaks and improve energy efficiency.
Follow these steps:
- Inspect the window frame for damage or decay that could compromise stability.
- Measure the inside width and height to confirm the unit fits securely.
- Remove obstacles around the window for unobstructed installation.
- Apply foam weatherstripping along window edges to block drafts and enhance energy efficiency.
Taking these simple steps will make your installation smoother and help keep your space comfortable. It’s worth the little extra effort!
Prepare Your Window AC Unit for Installation
Two key preparations will set your window AC unit up for a secure and efficient installation. First, attach the accordion-style side panels to the unit, making sure they fit snugly within the window frame. This step is essential for stability and proper sealing.
Next, inspect the window air conditioner thoroughly. Check for visible damages, confirm the air filter is clean, and verify that all electrical components, including the power cord and plug, work correctly.
Before you install a window AC, measure your window’s width and height to make sure the unit matches the opening dimensions precisely.
Also, follow the manufacturer’s instructions to install any required mounting rails. This will enhance the unit’s stability while it’s running.
These preparations help prevent operational issues and ensure your window air conditioner runs efficiently from the start. Taking these simple steps will save you time and hassle later on.
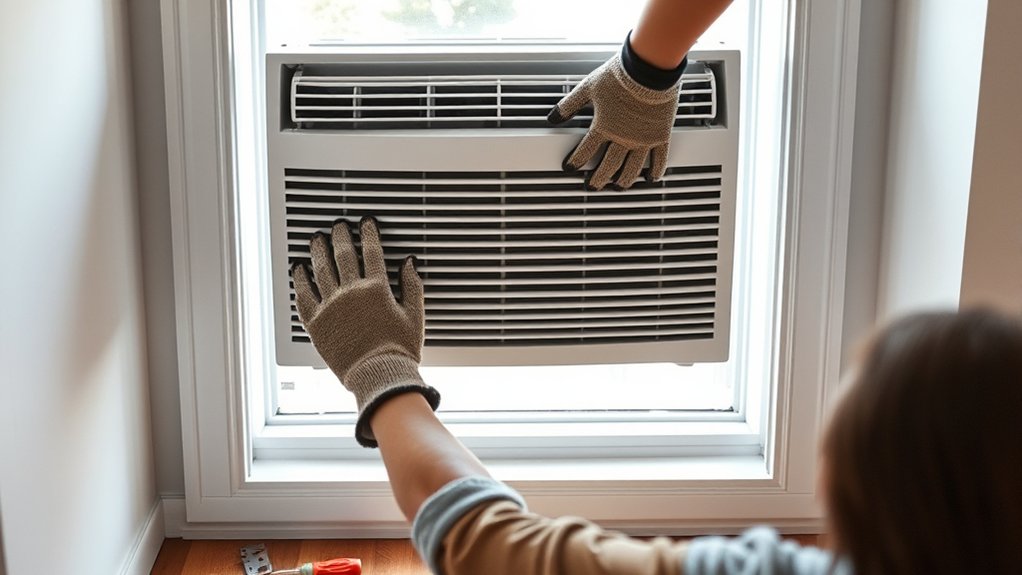
Lift and Position the Window AC Safely
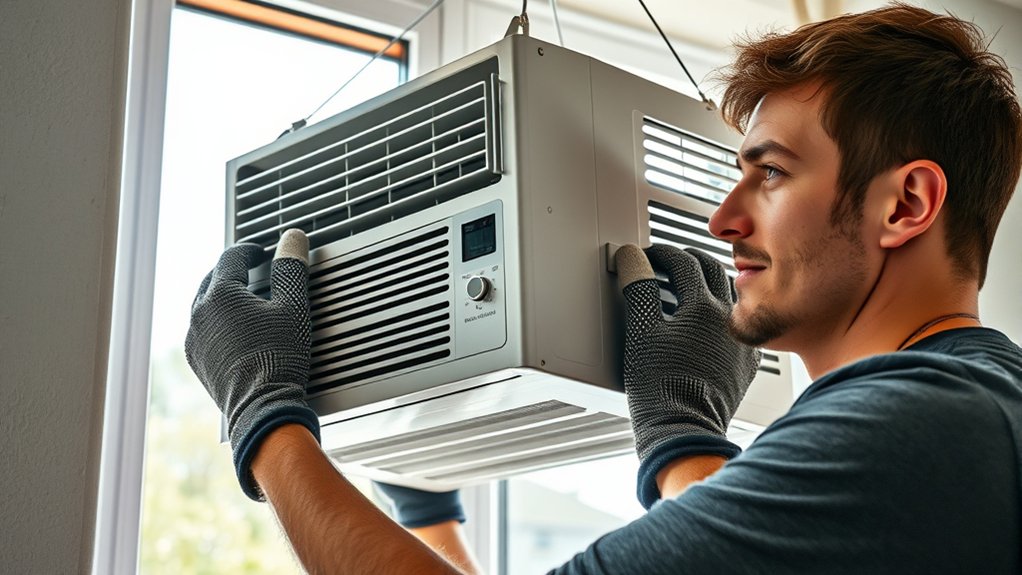
Lift your window AC unit carefully with the help of another person to prevent injury and damage. These units typically weigh between 50 and 100 pounds. Proper handling guarantees safety and preserves the unit’s integrity.
Follow these steps to lift and position the window AC safely:
- Lift the unit using a firm grip, keeping it balanced to avoid dropping.
- Center the unit within the window opening, ensuring even weight distribution.
- Verify a secure fit by measuring the window dimensions beforehand. This helps minimize gaps and air leaks.
- Position the unit slightly tilted, about one inch lower at the back, to allow proper condensation drainage.
If necessary, install support brackets to bear the AC’s weight and reduce stress on the window frame. This will help prevent long-term damage.
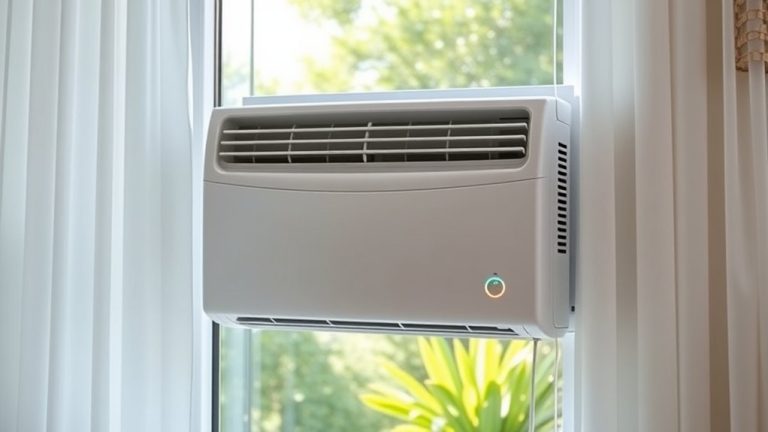
Secure the AC Unit With Brackets and Weatherproofing
Secure the AC unit firmly by installing support brackets designed to carry its weight and reduce stress on the window frame. Position the brackets according to the manufacturer’s specifications and fasten them securely with appropriate hardware to guarantee stability and safety.
Next, apply foam weatherstripping around gaps between the unit and the window frame to prevent drafts, enhancing energy efficiency.
For added protection, use bitumen-backed flashing tape around all joints to weatherproof the installation and prevent water intrusion. This step safeguards both the unit and your interior space from moisture damage.
Finally, regularly inspect the brackets and weatherproofing seals throughout the cooling season to detect any loosening or wear. This will help maintain a secure and energy-efficient installation over time.
Plug In Your Window AC and Test Its Operation
Plug your window air conditioner directly into a grounded outlet to guarantee safe operation and prevent electrical hazards.
Before you plug in your window AC, check the unit’s power requirements to confirm compatibility with your home’s electrical system. Usually, it’s 115V for smaller units or 220V for larger models.
Confirm your window AC’s voltage requirements—typically 115V or 220V—before plugging it in.
Once connected, test the air conditioner by setting it to the desired cooling mode and temperature.
Keep an eye on how the unit operates and follow these steps:
- Verify the unit powers on without tripping breakers.
- Listen for unusual noises that might indicate mechanical or installation issues.
- Make sure air flows properly from the vents by confirming it circulates freely.
- Check that the filter is clean and unobstructed to keep efficiency up.
These checks help ensure your window AC works safely and effectively.
Maintain Your Window AC for Long-Term Performance
Although installing your window air conditioner correctly is essential, maintaining it regularly guarantees peak performance and longevity. Regular maintenance prevents issues like clogged filters and dirty coils, ensuring the unit runs smoothly and efficiently.
Clean the air filter monthly to improve airflow and reduce energy use by up to 15%. Annually, inspect and clean the evaporator and condenser coils to avoid buildup that can impair cooling. Also, check seals and clear drain pans to prevent air leaks and water damage.
| Task | Frequency |
|---|---|
| Clean air filter | Monthly |
| Inspect coils | Annually |
| Check window seals | Regularly |
| Clear drain pans | Regularly |
Following these steps will help extend your AC’s lifespan and keep it running at its best.
Frequently Asked Questions
Can I Install a Window AC in a Non-Standard Window Shape?
Yes, you can install a window AC in non-standard window shapes, but you’ll face installation challenges due to size and fit issues.
You’ll likely need custom brackets or special mounting kits designed for your specific window shapes.
Alternatively, portable AC units with flexible exhaust hoses can also work.
Always follow manufacturer guidelines closely.
And consider professional help to guarantee a secure, efficient installation that prevents damage and optimizes cooling performance.
How Do I Safely Remove My Window AC During Winter?
To safely remove your window AC during winter, follow key AC removal tips: first, unplug the unit and remove any sealing materials.
Use safety precautions by having a helper support the weight as you tilt it slightly forward to drain water.
After removal, clean the unit thoroughly per your maintenance checklist.
For winter storage, place the AC in a cool, dry spot, covered to protect from dust and moisture. This way, it stays in good condition.
What Should I Do if My Window Frame Is Damaged?
If your window frame is damaged, start with frame repair techniques like wood filler for minor cracks or reinforcing with new wood for bigger issues. This works well with window insulation options.
You want a tight seal to keep drafts out and boost air conditioner maintenance.
Make sure to follow DIY installation tips carefully to guarantee structural integrity. If the damage is severe, it’s a good idea to consult a professional.
This helps avoid hazards and keeps your AC running efficiently for longer.
Are There Energy-Saving Tips for Using a Window AC?
Yes, for better energy efficiency, set your thermostat between 75°F and 78°F to enhance cooling without wasting power.
Use your unit’s energy-saving modes to adjust cooling automatically. Seal gaps around the window AC with weatherstripping to prevent air leaks.
Regular maintenance practices like cleaning or replacing filters monthly guarantee maximum airflow and efficiency.
Finally, use fans to circulate air evenly. This lets you raise thermostat settings without sacrificing comfort.
Can I Install a Window AC Without Drilling Into the Window Frame?
Yes, you can install a window AC without drilling into the window frame by using installation alternatives like self-supporting AC brackets or platforms. These options help hold the unit securely without damaging the frame.
To maintain a proper window seal, use timber trim pieces to fill gaps and make sure there are no airflow leaks. It’s important to keep the cool air inside and the hot air out.
Also, pay close attention to airflow considerations. Position the unit to maximize ventilation without any obstruction.
Seal joints carefully with waterproof tape to protect against moisture. This will keep the unit stable and secure while preventing water damage.
Conclusion
By choosing the correct capacity, checking connections, and carefully cleaning your window, you’ll confidently complete a crisp, cool installation. Secure the unit with sturdy supports, seal seams to stop sneaky drafts, and skillfully set the system in place.
Plug it in, perform prompt performance tests, and maintain meticulous care for maximum efficiency. Following these focused, fastidious steps guarantees your window AC works wonderfully, warding off warmth while withstanding wear.