Why Isn’t My Air Conditioner Working and How Can I Fix It?
If your air conditioner isn’t working, start by checking that the thermostat is set to “COOL.” Make sure the batteries are fresh and the temperature is properly adjusted.
Next, inspect your circuit breakers and verify that the outdoor unit’s power and disconnect switch are on. Replace any dirty air filters and clear debris around the outdoor condenser.
Look for mechanical issues like frozen coils or unusual noises. If cooling issues persist or refrigerant leaks appear, it’s a good idea to call a professional.
Explore these steps further to help restore your AC’s peak performance.
Check Thermostat Settings and Replace Batteries
Before troubleshooting any other component, check your thermostat settings and replace the batteries if necessary.
Start by confirming the thermostat is set to “COOL” and the temperature is at least 5 degrees below the indoor temperature to activate the cooling function.
If the AC isn’t turning on and the display is unresponsive or blank, replace batteries immediately, as dead batteries often cause these issues.
Verify the thermostat isn’t accidentally switched to “OFF” or “HEAT,” which disables cooling.
For programmable thermostats, confirm correct settings and calibration.
Outdated or incorrect programming can prevent proper operation.
If everything appears correct but the AC still won’t start, reset the thermostat by turning it off, then on.
These steps guarantee the thermostat controls the AC effectively before exploring other problems.
Inspect AC Circuit Breakers and Power Supply
When your air conditioner fails to power on despite correct thermostat settings, you should inspect the circuit breakers and power supply to identify any electrical interruptions.
Start by locating the electrical panel, typically in the garage, and check for any tripped circuit breakers supplying the AC unit. Reset any tripped breakers by switching them off and on, but keep an eye out for frequent trips because that usually signals an underlying issue.
Locate the electrical panel, check for tripped breakers, and reset them, watching for frequent trips indicating deeper problems.
Also, make sure the outdoor disconnect switch is ON since some AC units rely on this separate control.
If the breaker appears fine, take a look for blown fuses that can disrupt the power supply.
Inspect the electrical panel for tripped circuit breakers. Reset tripped breakers and watch for repeated trips.
Check the outdoor disconnect switch status and look for blown fuses affecting the AC power supply.
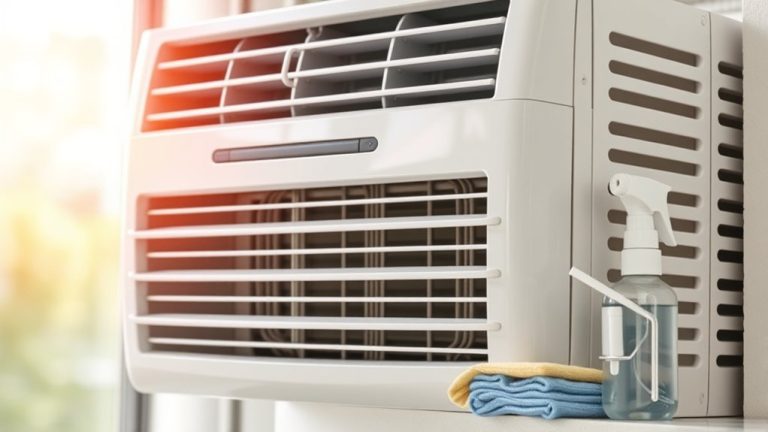
Replace Your AC Air Filter Regularly

Replacing your AC air filter every 1 to 3 months is essential for maintaining ideal airflow and system efficiency. When you replace your AC air filter regularly, you prevent a dirty air filter from restricting airflow, which directly impacts cooling efficiency.
Reduced airflow can cause your system to overheat or freeze, leading to costly system shutdowns. Check filters monthly during peak seasons to avoid dust buildup that hinders performance.
Use the correct size and type of filter to guarantee no unfiltered air bypasses it, protecting indoor air quality. Regular maintenance, including timely filter replacement, helps extend lifespan and boosts energy efficiency, reducing utility costs.
Staying proactive with filter replacement is a straightforward step that safeguards your AC’s performance and longevity. It’s a small effort that pays off big in the long run.
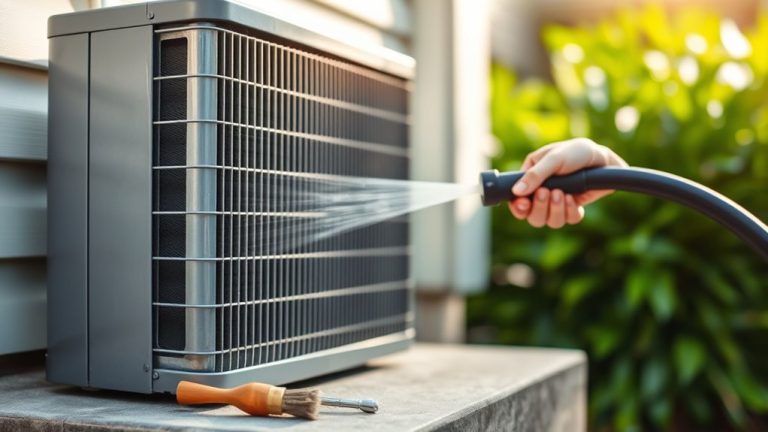
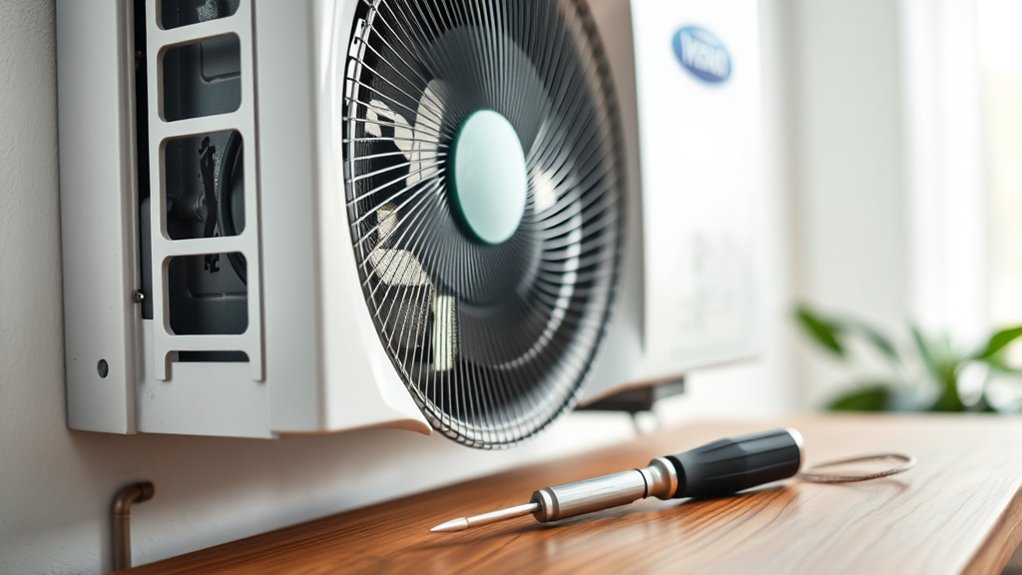
Clear Debris From Your AC Outdoor Unit
You should regularly remove leaves and dirt from the outdoor unit to keep the airflow clear and your system running efficiently.
While you’re cleaning, take a close look at the electrical wires and the disconnect switch. Make sure there’s no damage or corrosion.
Keeping these parts clean and in good shape helps prevent system failures and ensures everything runs safely.
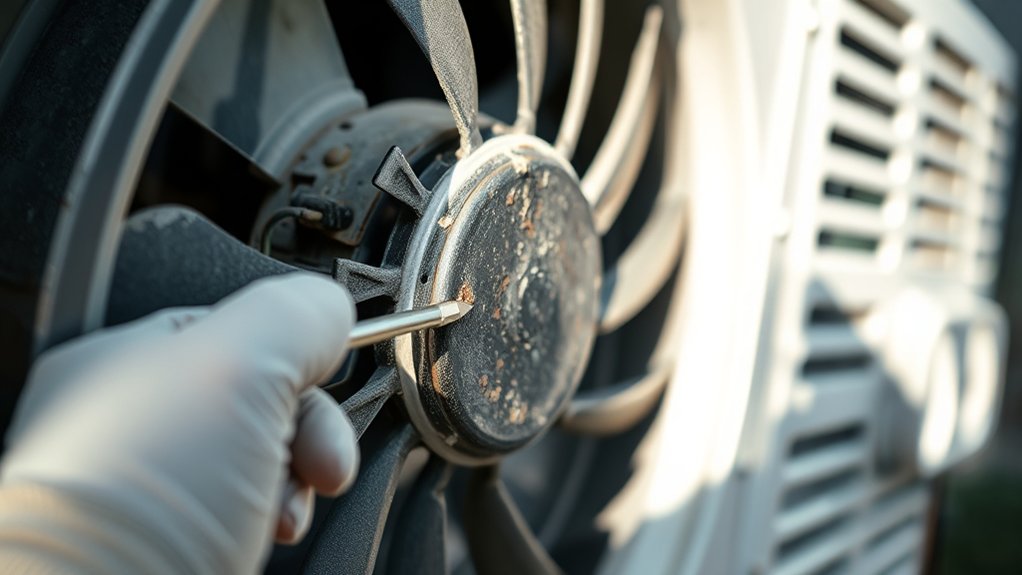
Remove Leaves and Dirt
Although often overlooked, clearing leaves and dirt from your outdoor AC unit is essential for maintaining effective airflow and cooling performance. Debris buildup restricts heat dissipation and causes condenser coils to overheat, reducing system performance.
Regular inspecting and cleaning help prevent costly repairs and prolong lifespan. When maintaining your outdoor unit, make sure there’s a clear space of at least two feet around it.
Remove leaves, twigs, and dirt gently using a soft brush or vacuum. Avoid damaging condenser coils during cleaning so your unit can keep running at its best.
It’s a good idea to check for debris buildup regularly to keep airflow steady. Schedule routine maintenance sessions to boost performance and reliability.
Consistent cleaning and debris management are key for your AC’s efficient heat transfer and long-term functionality. Taking these simple steps will help your system run smoothly for years to come.
Inspect Wires and Switch
Before diving deeper into electrical components, make sure to inspect the outdoor unit for any visible debris like leaves or dirt. These can block airflow and reduce cooling efficiency.
Next, take a close look at the wires and electrical connections. Check for any damage or loose fittings because these can cause power disruptions. It’s important to catch these early.
Don’t forget to check the emergency shut-off switch near the outdoor unit. Make sure it’s in the ON position so the unit can operate properly. Damaged wires or loose connections can lead to failures or even safety hazards.
Keeping everything secure is key to maintaining your system and getting the best cooling performance.
| Component | What to Inspect | Potential Issue |
|---|---|---|
| Wires | Fraying, wear, secure fittings | Power disruption |
| Electrical Connections | Tightness, corrosion | Cooling inefficiency |
| Emergency Shut-Off Switch | Position (ON/OFF) | Unit won’t operate |
Identify Common Mechanical Problems in Your AC
You’ll want to keep an eye on the compressor and fan because they’re key to keeping your AC running smoothly. If you notice any overheating or strange noises coming from them, that’s a sign something might be wrong.
Also, refrigerant leaks are a common culprit that can cause the evaporator coil to freeze up and make your cooling less effective. So, it’s a good idea to check for any leaks or frost buildup.
Catching these problems early can really help your system perform better and save you from expensive repairs down the line.
Compressor And Fan Issues
When your air conditioner struggles to cool efficiently, the compressor and fan are often the primary culprits. The compressor circulates refrigerant, and if it fails due to electrical issues or worn parts, you’ll notice inadequate cooling and unusual noises like buzzing or clanking.
Similarly, a malfunctioning fan reduces airflow, causing overheating and sometimes tripping the circuit breaker. To keep things running smoothly, regularly inspect and clean fan blades to prevent obstructions.
However, because handling refrigerant and electrical components is hazardous, it’s always best to seek a professional assessment for compressor or fan problems.
Compressor failure leads to poor refrigerant circulation and cooling loss.
Fan issues cause restricted airflow and potential overheating.
Unusual noises often signal compressor or fan malfunction.
Circuit breaker trips may indicate fan-related electrical problems.
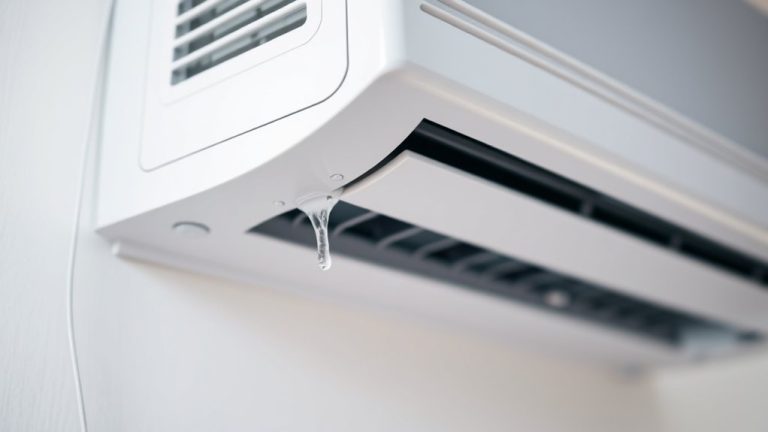
Refrigerant Leaks And Freezing
Although refrigerant leaks may start small, they quickly lead to insufficient cooling and can cause evaporator coils to freeze, blocking airflow and disrupting your AC’s performance.
Refrigerant leaks reduce system pressure, causing ice buildup on frozen evaporator coils. This ice obstructs airflow, further lowering cooling efficiency.
Often, dirty filters or blocked ducts make airflow problems worse and intensify freezing issues. You’ll notice reduced cooling efficiency and possibly higher energy bills when leaks happen.
Regular inspections and maintenance are critical to catch refrigerant leaks early and avoid costly repairs.
Since low refrigerant levels usually mean leaks, don’t recharge the system yourself. Instead, hire a professional to find and fix leaks according to environmental regulations.
Also, keeping filters clean and ducts clear helps restore proper airflow, preventing frozen coils and keeping your AC running at its best.
Troubleshoot If Your AC Won’t Start
Five critical steps can help you troubleshoot an air conditioner that won’t start.
First, check the thermostat settings to confirm it’s set to “COOL” and the temperature is at least 5 degrees below the current indoor temperature.
Next, inspect the circuit breaker for any tripped switches and reset them if needed to restore power.
Then, examine the air filter; a dirty filter restricts airflow and is a common cause of startup failure.
Also, clear any debris around the outdoor unit to maintain proper airflow and operation.
If these troubleshooting steps don’t resolve the issue, contact an HVAC professional for a detailed diagnosis and repair.
Addressing these common causes systematically can often restore your AC’s function efficiently.
- Verify thermostat settings
- Reset tripped circuit breaker
- Clean or replace dirty air filter
- Remove debris blocking outdoor unit
Understand How Low Refrigerant Affects AC Performance
If your AC isn’t cooling like it used to, or you notice the evaporator coils are freezing up, low refrigerant might be the culprit.
When there’s not enough refrigerant, the system can’t absorb heat properly. This means your AC has to work harder and run longer just to try and reach the temperature you set.
Catching these signs early can save you from higher energy bills and prevent damage to your unit down the line.
Signs Of Low Refrigerant
You’ll notice several clear signs when your air conditioner is running low on refrigerant, and each one directly impacts how well it cools your space. Low refrigerant levels reduce cooling efficiency and force your system to work harder. This extra effort can lead to higher energy bills.
Common signs of low refrigerant include warm air blowing from the vents and ice buildup on the evaporator coils. Refrigerant leaks often happen at connections and joints. If left untreated, they can cause serious damage to your compressor.
Watch for these indicators:
- Warm air blowing instead of cool because there isn’t enough refrigerant
- Ice buildup on evaporator coils caused by low pressure
- A sudden spike in energy bills from overworked components
- Visible refrigerant leaks or hissing sounds near fittings
It’s always best to hire a qualified HVAC technician to safely diagnose and repair refrigerant leaks. Don’t try to handle refrigerant issues on your own!
Impact On Cooling Efficiency
Although low refrigerant levels might seem like a minor issue, they directly impair your air conditioner’s ability to absorb heat from indoor air, resulting in insufficient cooling.
In an air conditioning system, low refrigerant reduces cooling efficiency by limiting heat transfer, causing the evaporator coils to freeze. Frozen evaporator coils block airflow, compounding the problem and further reducing cooling capacity.
Refrigerant leaks contribute to this issue and strain the AC compressor, risking overheating and expensive repairs. You should aim for proper refrigerant levels to maintain a 20°F to 30°F temperature drop between coils, ensuring peak performance.
To prevent insufficient cooling, include routine maintenance that checks refrigerant levels, inspects for leaks, and replaces clogged air filters to preserve airflow and protect your system’s efficiency.
It’s really the best way to keep your AC running smoothly.
Recognize When Your AC Runs but Doesn’t Cool
How can you tell when your air conditioner runs but doesn’t cool effectively? First, check that the thermostat is set to “cool” and the temperature is at least 5 degrees below room temperature.
Next, inspect the air filter for dirt or clogging, which restricts airflow and reduces cooling efficiency.
Check your air filter for dirt or clogs that can block airflow and lower cooling performance.
Also, examine the outdoor condenser unit for blocked coils or debris that hinder heat exchange.
Finally, look for frozen coils inside the system; frost indicates airflow issues or refrigerant problems. Low refrigerant levels from leaks greatly impair cooling capacity and require professional attention.
- Verify thermostat settings and temperature difference
- Inspect and replace dirty air filters regularly
- Clear debris from outdoor condenser coils
- Watch for frozen coils and restricted airflow
These steps help identify when your AC runs but doesn’t cool properly.
Know When to Call an HVAC Professional
When basic troubleshooting steps like checking the thermostat, circuit breaker, and air filter don’t resolve your AC issues, it’s time to call an HVAC professional.
Persistent cooling issues, frequent circuit breaker trips, or unusual noises signal problems beyond simple fixes.
If you notice ice buildup or suspect a refrigerant leak, only a qualified technician should handle repairs due to safety and complexity.
HVAC professionals can diagnose electrical components and mechanical failures that typical troubleshooting won’t reveal.
They use specialized tools to evaluate your AC unit thoroughly, preventing further damage.
Regular professional inspections and maintenance not only resolve current problems but also extend your unit’s lifespan and efficiency.
Follow Key Maintenance Tips to Prevent AC Breakdowns
Maintaining your air conditioner regularly prevents costly breakdowns and guarantees efficient performance throughout the cooling season.
To keep your HVAC system running smoothly, focus on routine maintenance tasks that optimize airflow and prevent undue strain.
Prioritize routine maintenance to enhance airflow and reduce unnecessary stress on your HVAC system.
Replace or clean the air filter every 1-3 months to maintain proper airflow and prevent clogging. Keep the outdoor condenser clear of debris and guarantee at least two feet of clearance for effective heat dissipation.
Schedule professional inspections annually to detect and address potential issues early.
Monitor and calibrate the thermostat to ensure accurate temperature control and efficient cooling.
Following these key maintenance tips preserves your system’s longevity and performance while minimizing unexpected failures during peak cooling periods.
It’s really worth the effort to stay on top of these simple tasks!
Frequently Asked Questions
How Does an Air Conditioner Remove Humidity From My Home?
Your air conditioner removes humidity by circulating warm indoor air over cold evaporator coils during the refrigerant cycle. This cools the air, causing moisture to condense on the coils.
Then, the condensate drainage system removes that moisture.
The compressor keeps everything running smoothly and maintains cooling efficiency. This helps your AC control humidity effectively.
Proper air circulation and seasonal maintenance are key to keeping energy use ideal.
Plus, regular upkeep enhances indoor comfort by removing moisture.
And don’t forget—keeping your filters clean boosts both humidity control and cooling efficiency. It’s a simple step that makes a big difference!
Can Using Ceiling Fans Reduce the Need for Air Conditioning?
Like Daedalus crafting wings to tame the air, you can harness ceiling fan benefits to reduce your air conditioning need.
By optimizing fan speed and considering room size, you improve air circulation, aiding temperature regulation and humidity control.
This seasonal use boosts home comfort while delivering cost efficiency.
With fans consuming far less energy, you achieve significant energy savings, making them a practical ally alongside your AC for balanced, efficient cooling.
What Temperature Should I Set My Thermostat for Energy Efficiency?
Set your thermostat to 78°F during peak times for ideal cooling efficiency and energy savings.
Use seasonal adjustments by raising it 5-10°F when you’re away or sleeping to reduce costs. Avoid temperature fluctuations to maintain consistent comfort levels and humidity control.
Smart thermostats help automate settings, balancing comfort and cost analysis effectively.
Proper thermostat settings minimize energy spikes, which enhances overall system performance while keeping your cooling bills lower.
It’s a simple way to stay comfortable without wasting energy.
How Can I Improve My Ac’s Airflow Without Professional Tools?
You can improve your AC’s airflow by performing regular air filter maintenance and following duct cleaning tips to clear blockages.
Adjust fan speed for ideal circulation and enhance vent placement to avoid obstructions.
Seal leaks in ducts and improve insulation to prevent air loss.
Check your thermostat location to guarantee accurate readings, adjust airflow direction properly, and control humidity levels.
Finally, balance your system by guaranteeing even airflow distribution throughout your space.
These simple steps can make a big difference without needing professional tools.
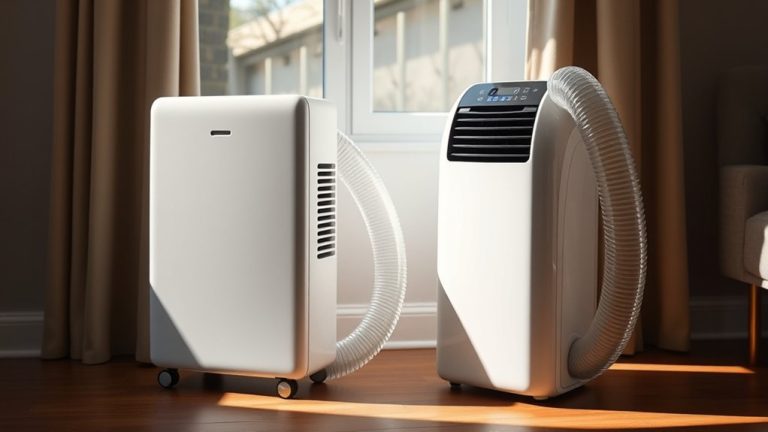
Are Portable Air Conditioners as Effective as Central Units?
Like a telegraph in a smartphone era, portable air conditioners can’t fully match central units in cooling efficiency or consistent airflow.
You’ll notice portable vs central differences in installation requirements. Portable units need venting but cost less upfront.
Expect higher energy consumption and noise levels from portables, plus more frequent maintenance.
Still, their portability benefits suit small spaces and user preferences.
Central systems excel in larger areas, offering better long-term cost savings and performance.
Conclusion
If your air conditioner feels like it’s lost its cool, don’t sweat it. Start by checking the thermostat, breakers, and filters. Clearing debris and spotting mechanical issues early keeps your system humming smoothly.
Low refrigerant is often the hidden culprit, so stay alert to subtle signs. When DIY fixes fall short, call an HVAC pro to avoid costly breakdowns. With these hands-on tips, you’ll keep your AC running like a well-oiled machine, ready to battle the heat.